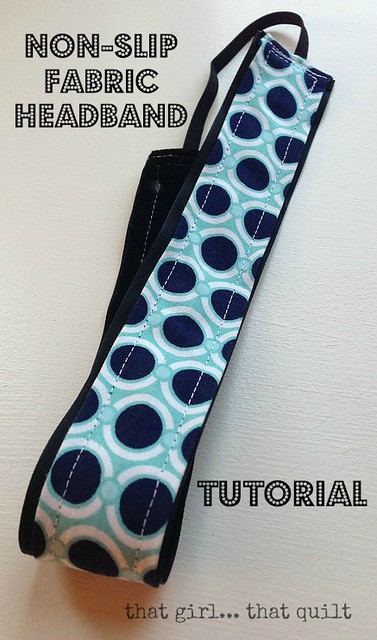
I see these cute headbands everywhere! Chaney wore them for softball and I've probably spent a total of $75 on them for her because they don't slip in her fine hair.
When I workout I have two choices to control my curly mop... wear a hat or wear some sort of headband. Hats are alright but sweat + something on your forehead can = a breakout even when you are 35. The headbands I have bought in the store either slip or give me a giant headache.
So I started looking at Chaney's last headband {the rest have disappeared UGH} and I realized that the non-slip material was nothing more than velveteen. That's it! Her headbands have always had cute ribbons on them but I don't have an abundance of ribbon but I do have an abundance of fabric... especially 2.5" strips of fabric. I also have some velveteen fabric that I'm going to make some of these with... :)
I've made several of these now so I thought I'd share the my tutorial. You can make them in varied widths but this tutorial gives you a wider band that measures approximately 1.5" wide. The measurements I use here create a band that will fit Chaney {she's 9} and me.
Here's what you need:
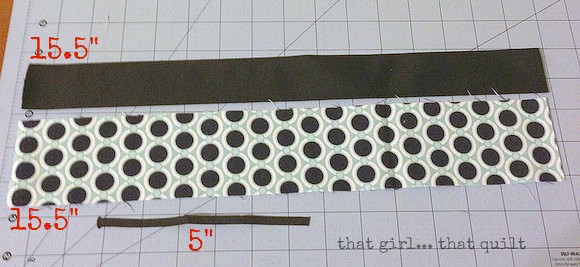
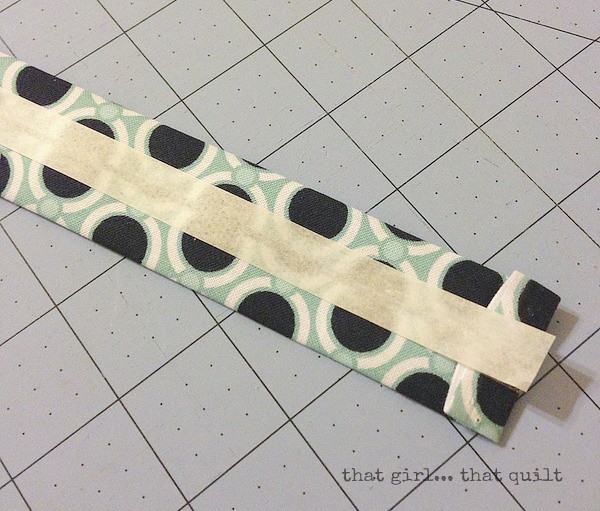
15.5" x 1.5" velveteen ribbon { must be satin on the back of the ribbon}
15.5" x 2.5" fabric scrap
5" x 7/8" of woven elastic
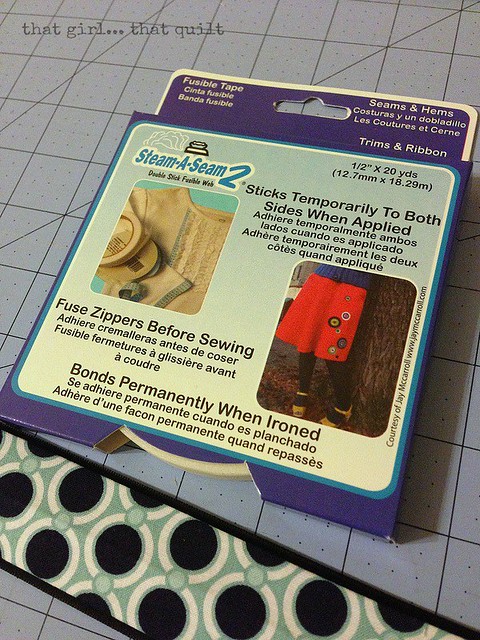
15" x 1/2" of Steam-a-Seam2 {not necessary but really helpful!}
Thread that coordinates with your fabric {don't worry about it coordinating with the velveteen because the stitches pretty much disappear in the velvet}
Iron
Sewing machine
Here we go!
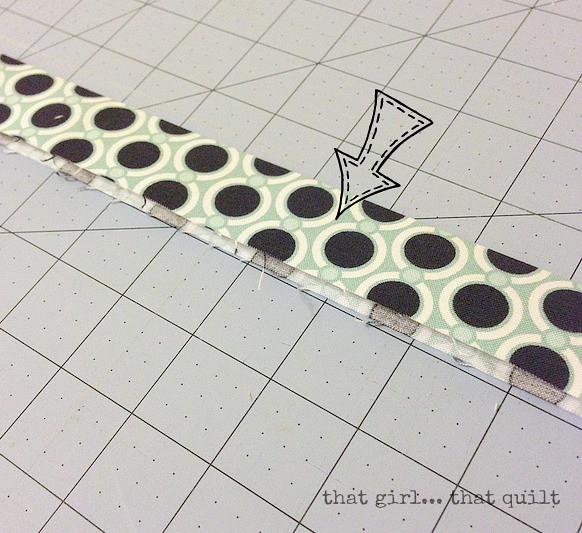
1. Take your fabric strip and fold exactly in half {width wise}, wrong sides together as shown. Press.
2. Open your strip and use the pressed line you just made as a guide to fold both edges toward the center as shown. This will encase your raw edges. Press again.
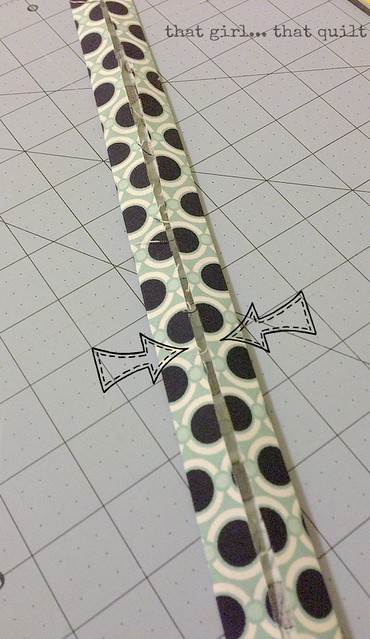
3. Apply your 15" of Steam-a-Seam2 to the back of your fabric strip as shown.
Follow the instructions on the package for specifics on how to use the product.
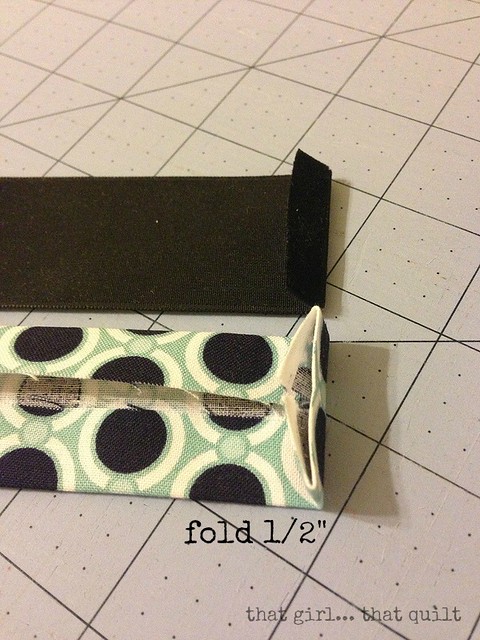
4. Fold both ends of your velveteen ribbon AND your fabric strip 1/2" in as shown. This will encase the raw ends.
5. Center your fabric strip on the satin side of your ribbon. Press the fabric onto the satin side of the ribbon to activate the Steam-a-Seam2; this will help stabilize the band while you stitch the fabric to the ribbon.
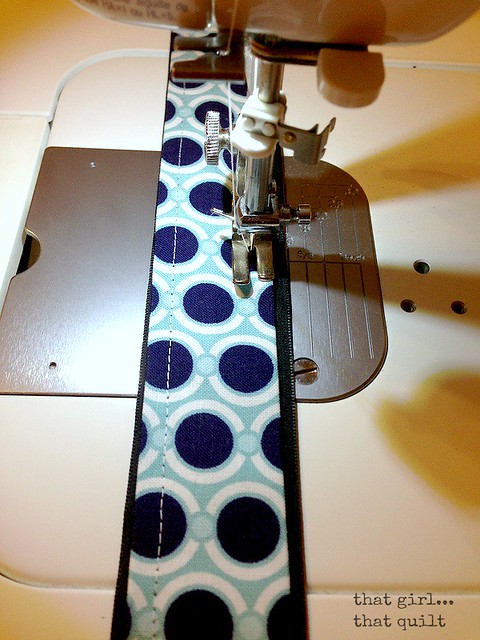
6. Stitch down both sides of the fabric to secure the fabric to the ribbon. STOP about 1/4" before the ends so you can insert your elastic.
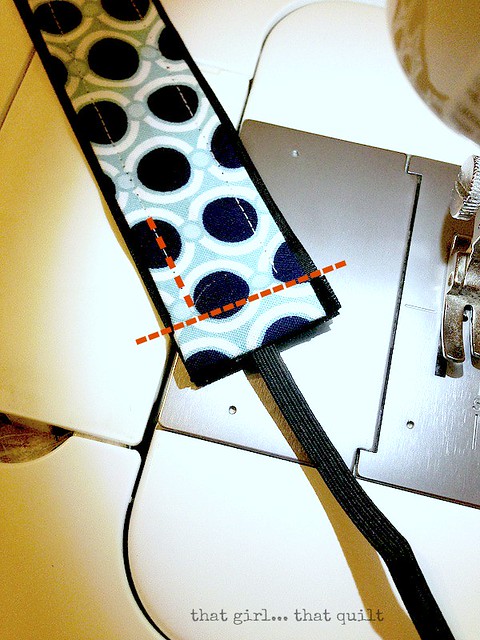
7. Center your elastic in the opening between the fabric and ribbon at one end. Start where you left off and stitch across to secure the elastic. I stitched over this part several times to make sure the elastic will remain secure while wearing your headband. Repeat this step on the other end of the band.
8. Trim any stray threads and you're done.
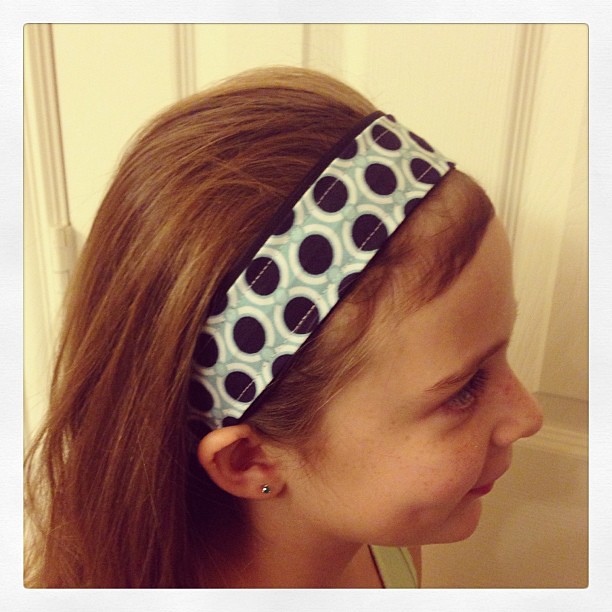
Enjoy! These bands look adorable for casual wear with no slipping...
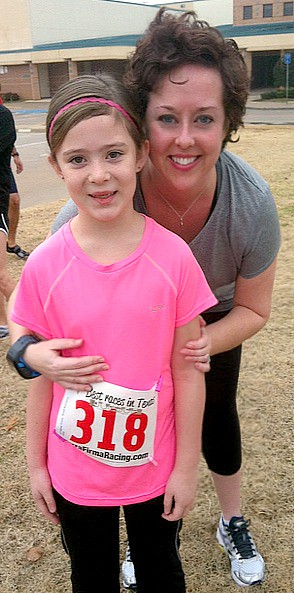
I should have worn one of these bands for this race. 100% humidity + my hair isn't a good look!
... they also tame my beastly curls when I run and I've never ended up with a headache.
Note: These are hand washable. I wash my bands in Woolite and let them air dry.