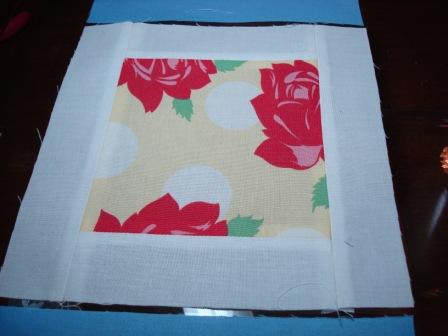
Are you reading to start sewing? This week we will be piecing our blocks!
Here we go...

Take your charm square and two of your inner border strips that measure 5"x1.5". With a 1/4" seam allowance, stitch the strip to one side of the square.

I highly recommend chain piecing whenever possible when you are piecing blocks. It is more efficient, uses less thread and helps you keep the piecing steps straight since you are doing the same step over and over on each block until that step is complete.
So to do that here you will take 1 5" strip and stitch it to the charm square. Instead of lifting your presser foot, you will stitch to the end of that block and feed the next block under your presser foot. The feed dogs will grab the fabric and you will be stitching your next block without having to raise the foot, cut thread, etc.
If you choose this method you will do this step on all 40 blocks before moving to the next step. It goes super fast like this!

The thread you see between the two blocks is the "chain" that gives this method its name of "chain piecing". You will snip these chains once you are done with the step and are ready to move to the next step...

Once you have your 5" strips attached to both sides of your charm square you will need to press the block open. There are two schools of thought here... one is pictured above and that is pressing your seams open.

Shown here is pressing your seams away from the lighter fabric so the seam won't show as much. To me, which way you press the seams is a personal choice and it doesn't matter a whole lot in the grand scheme of things in a quilt like this one. Where it would matter is when the blocks are small and/or there are lots of seams...

Once you have your seams pressed you are now ready to attach the 7"x1.5" strips to the other two sides of the charm square. You can either chain piece this step at well or sew each block individually.
Once these strips are attached, press your block open and you will be done with the inner border of your blocks!

Following your chosen piecing method, attach your outer border strips that measure 7"x2" to opposite sides of your block. It doesn't matter which sides... Once this step is done press your block open.

You are now ready to attach the strips measuring 10"x2" to the remaining sides of your block. Once again either chain piece or sew each block individually.

Complete all 40 blocks, press them open and you now have your blocks pieced! Congrats!
As always, please let me know if you have any questions. Be sure to post your progress pictures over in our Flickr group!
Next week we will be squaring our blocks, making them "wonky", and sewing the blocks together to make the quilt top!
I have posted each week's instructions on the left sidebar of my blog but here are the individual links as well:Week 1Week 2